
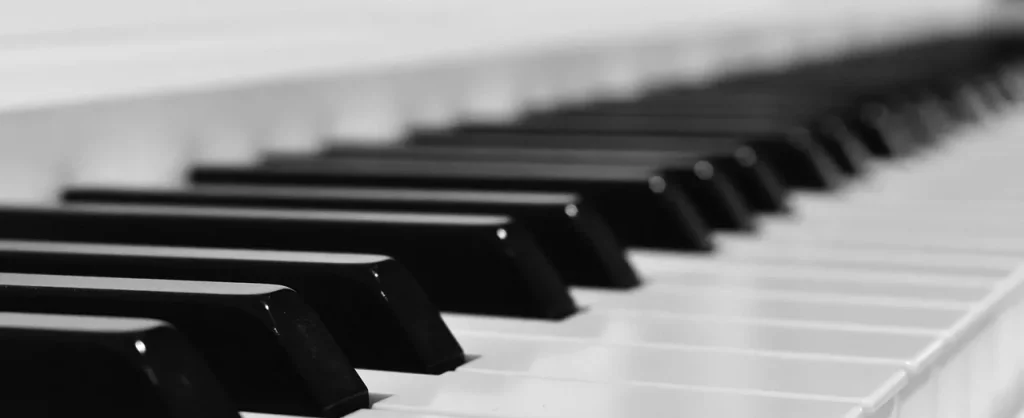
The melodica appeals to musicians with its piano-like tone and portability. This wind instrument, popularized by historic brands such as Hohner, remains accessible to musicians of all levels.
Getting started requires patience and a methodical approach. With simple posture and breathing exercises, you will quickly learn your first melodies.
This guide presents the essentials: hand position, breath control, and step-by-step progression. Each stage is designed to make learning smooth and motivating.
Key benefits: a variety of instruments by Hohner, structured progression, and the pleasure of playing from the very first days.
Whether you are a beginner or an experienced musician, follow this path to gain confidence and musicality. Solid foundations make interpretation and improvisation easier.
Melodica lessons: where beginners should start
To get off to a good start, first establish clear foundations for breathing and keyboard technique.
The melodica was long used instead of the recorder in music schools. This history explains its educational role.
The first foundation of learning is to acquire knowledge of the notes and become familiar with the keyboard. The key layout makes intervals easier to visualize than on other wind instruments.
Learning to play requires discipline. Thanks to the keyboard, however, you can quickly locate notes and avoid bad habits. A solid foundation lets you play simple tunes quickly and refine your musical ear.
To learn more about the models and how they are used, see the description of the Hohner model.
- Memorize the notes on the keyboard.
- Practice blowing steadily.
- Establish short, frequent practice routines.
Understanding how this wind instrument works
The melodica produces sound through a simple but precise mechanism. It is a free-reed instrument. Air pushed by the player causes reeds mounted behind the keyboard to vibrate.
The free-reed mechanism
The principle is similar to that of a harmonica: each key opens a passage to a reed. Pressing the key then allows air to flow and produce the note.
Without breath, there is no sound. The interaction between your fingers and your breath forms the basis of tone and dynamics.
- Responsiveness: the note responds immediately when the key is pressed.
- Control: volume depends on airflow and finger pressure.
- Distinctive feature: no sound is produced without the combined action of breath and fingers.
| Component | Function | What it means for the student |
|---|---|---|
| Free reed | Vibrates when air passes through | Understanding the basis of sound production |
| Key | Opens the air channel | Precise control of notes |
| Breath | Powers the vibration | Control of dynamics and volume |
To deepen your knowledge of the wind-instrument family and its mechanisms, read this article.
The different types of models available
Today’s range offers instruments for every register and skill level. Choosing the right model depends on the desired range, number of keys, and sound quality.
The soprano remains the most common. The Hohner Soprano (C 9451) has 25 keys and a range from C4 to C6. This configuration lets you play melodies spanning two complete octaves, making it ideal for learning and simple tunes.
The alto model
The alto model has a mezzo range. It can complement the soprano and enrich group arrangements.
For more power and lower notes, the Hohner Piano 36 (C 9462) offers 36 notes. This type of model provides better sound quality and an extended range, useful for playing deeper lines.
- Soprano: 25 keys, C4–C6, a perfect foundation for melodies.
- Piano 36: 36 notes, extended range, enhanced sound quality.
- Alto: mezzo voice, a useful addition to an ensemble.
Choosing your first melodica to suit your needs
A good beginner instrument combines ergonomics, range, and durability.
The Hohner Student 32 (C 94324) is an ideal starting point for learners. Its 32 keys provide more possibilities than a small keyboard. This model remains recommended for its reliability and ease of use.
Used instruments can often be found at reduced prices. Expect to pay around €30 to €40 for a used Hohner in good condition. Spending a little more, however, can provide better quality and greater durability.
- Practical choice: the Student 32, manageable and full-featured.
- Attractive used price: around €30 to €40.
- Choose according to the number of keys and your goals: learning or playing in a group.
| Criterion | Recommended option | Result |
|---|---|---|
| Number of keys | 32 (Student 32) | More melodic options |
| Price | Used: €30–€40 / New: slightly more | Savings or quality |
| Use | Learning or group playing | Choice based on your goals |
The key layout and piano keyboard
The keyboard layout is exactly the same as a piano’s, making note recognition much easier for any musician.
This visual foundation helps pianists adapt immediately. The white and black keys retain the same reference points.
Instruments often have 26 or 32 keys. A 26-key model can play complete melodies. With 32 keys, the piano keyboard offers greater polyphonic possibilities for richer chords.
Intervals become easy to visualize. This layout provides a fundamental basis for avoiding confusion between scale degrees.
- Muscle memory: repetition on this keyboard strengthens automatic finger movements.
- Adaptation: pianists and beginners save time thanks to familiar reference points.
- Polyphony: 32 keys let you combine chords and melodic lines.
| Feature | 26 keys | 32 keys |
|---|---|---|
| Range | Ideal for simple melodies | More low and high notes |
| Polyphony | Limited, simple chords | Complex chords possible |
| Audience | Beginners and children | Serious learners and ensemble musicians |
To strengthen your keyboard foundations and follow a clear method, see this keyboard course.
Adopting the correct playing posture
A stable posture quickly improves the quality of your playing. From the very first session, support the instrument by its lower section with your thumbs. This provides greater stability and reduces unwanted movement.
Your fingers should remain slightly curved and relaxed. This position makes it easier to move them across the keys during daily practice.
Fluid playing begins with hand position. Your hands should never remain pressed against the body of the instrument. Leaving a small gap improves mobility and precision.
Holding the instrument like a recorder encourages airflow and gives you greater freedom of movement. This position helps maintain steady breath and better dynamic control.
Remember: adopt correct posture from the outset. It prevents unnecessary tension and enables cleaner performance.
To supplement this advice, follow a complementary method offering targeted exercises for holding the instrument steadily.
The essential role of the right hand
The right hand often plays a key role in musical phrases. Place it in the center of the keyboard to reach notes accurately.
Right-hand fingering forms the foundation of the melody. Consistent coordination lets you play notes one after another without hesitation.
Each key requires light pressure. This helps the hand move quickly across the 25 or 32 keys while maintaining a clear sound.
The right hand does most of the playing, especially in complex melodies. Practice slowly to secure the movement.
- Position your hand in the center to cover the keys.
- Practice fingering with short scales.
- Keep your fingers relaxed and apply consistent pressure.
By consolidating this foundation, your right hand will become reliable. You will then be better able to play expressive notes and refine your interpretation.
Mastering left-hand placement
Positioning the left hand correctly improves support and instrument stability. The left hand should sit between the mouthpiece and the right hand, supporting the instrument without getting in the way.
Left-hand fingering is often reversed compared with right-hand fingering. This reversal requires a precise practice foundation and regular exercises.
Work slowly to synchronize both hands. Keep your fingers slightly curved so that you do not obstruct airflow to the notes.
- Stable position between the mouthpiece and the right hand.
- Specific fingering and progressive practice.
- Keep your hands away from the instrument’s body to make movement easier.
| Aspect | Practical advice | Effect |
|---|---|---|
| Placement | Between the mouthpiece and the right hand | Stability and control |
| Fingering | Exercises reversed relative to the right hand | Better coordination |
| Fingers | Slightly curved, with hands held away from the body | Optimized airflow and mobility |
Learning to control your breath
Breath control transforms a simple note into an expressive musical phrase.
Breath control is the foundation of expression on a wind instrument. It determines the length and sustain of each melody.
Learn to distribute your breath according to the meter and timing of the piece. Breathe before long phrases and place breaths between beats to avoid interruptions.
Regular breathing practice prevents you from becoming short of breath. Spend a few minutes each session on slow exercises. This provides a solid foundation for sustaining long melodic lines.
Controlled breath also lets you shape the melody’s intensity. By regulating the air, you add emotional depth to your playing and vary its nuances.
| Goal | Exercise | Effect |
|---|---|---|
| Sustain a phrase | Segmented breathing over 4 beats | Continuity of the melody |
| Conserve air | Short, controlled breaths | Greater endurance |
| Vary intensity | Play crescendos and decrescendos | Musical expression |
In summary: devote time to breathing, as it provides a foundation for more secure phrases and livelier melodies.
Using the mouthpiece and flexible tube
Using the mouthpiece and tube correctly changes how you control your breath.
The mouthpiece should be positioned just behind the teeth, with the lips closed but relaxed. This grip creates an airtight seal and prevents air leaks that affect the sound.
The foundation of a good hold rests on this simple action: close your lips around the mouthpiece without tensing. This keeps the pressure constant and makes dynamics easier to control.
In some situations, the flexible tube is very useful. It lets you place the instrument on a table and play with both hands free.
The tube is well suited to keyboard models when you want to accompany music or annotate a score. It also makes long pauses easier without compromising ergonomics.
Sometimes it is better to play directly through the mouthpiece, especially in expressive passages that require a more immediate relationship between breath and fingering.
| Component | Recommended action | Benefit |
|---|---|---|
| Mouthpiece | Place behind the teeth with relaxed lips | Airtight seal and breath control |
| Flexible tube | Use it to set the instrument down | Frees the hands and improves posture |
| Model | Choose based on use (handheld or resting on a surface) | Adaptation to your style and comfort |
To try a good model with a tube, take a look at this recommended option: Hohner Ocean 32. It illustrates the balance between ergonomics and quality well.
Tonguing technique for articulation
Coordination between the tongue and breath transforms each note into crisp, rhythmic articulation.
The basic technique is to pronounce the letter “T” to interrupt the air and produce a precise attack. This simple action puts the tongue at the heart of control.
Place the tongue against the mouthpiece, then quickly withdraw it to release the air. This action clearly defines each note.
The time devoted to this exercise becomes a true foundation for articulated playing. Practice in short repetitions while keeping the meter.
- “T” tongue stroke: crisp attack.
- Tongue withdrawal: releases the air.
- Short repetitions: consolidate the foundation.
| Action | How | Effect |
|---|---|---|
| Attack | Pronounce “T” | A clean note from the outset |
| Release | Withdraw the tongue from the mouthpiece | A clear note ending |
| Practice | Short, regular sessions | A solid foundation for articulation |
By repeating the tonguing technique, you will gain rhythmic precision. This foundation will make your interpretation more expressive and controlled.
Reading sheet music for melodica
Reading a score begins by locating the notes on the piano keyboard. This knowledge creates the foundation for fluent reading.
The foundation of music reading is following the melody while observing the indicated meter. Read the score slowly, count the beats, and identify the rests.
Once you master reading, you will play each melody accurately. Work on hand coordination to enrich the harmonic part.
The technical side depends on understanding symbols: clefs, accidentals, and rhythms. This foundation guides your interpretation and accelerates your progress.
| Element | What it indicates | Effect on playing |
|---|---|---|
| Clef | Position of the notes | Locating them on the piano keyboard |
| Accidentals | Raised or lowered notes | Immediate fingering adjustment |
| Rhythm / meter | Note duration | Following the tempo and melody |
| Articulations | Attack and connection | Musical expression |
Learning to read music opens the door to many styles, from classical to jazz. Repeat each passage several times: the knowledge becomes more deeply rooted with every repetition.
Basic exercises for rapid progress
A short, regular routine lays the foundation for visible progress. Start with 10-minute sessions focused on accuracy rather than speed.
Keyboard fingering
Practice fingering by playing five-note scales. Move the right hand and then the left hand separately to ingrain each movement.
Focus on the position of your fingers on the keys. Keep them rounded and repeat the movements slowly to memorize their placement.
Hand coordination
Next, practice both hands together at a slower tempo. Play one measure, then gradually increase the tempo and speed.
- Alternate simple chords and melodic lines.
- Prioritize clear notes over quantity.
- Repeat the exercises daily to consolidate the foundation.
By following these exercises, your hands will learn to synchronize. Your accuracy when playing notes and your fluency on the keyboard will improve quickly.
Maintaining your instrument for better sound quality
A maintenance routine prevents moisture buildup and extends the instrument’s life.
The essential step is to drain condensed water after every session. This prevents reed corrosion and preserves good sound quality.
Clean the mouthpiece and tube with a dry cloth. For the interior, use a blower or a thin cloth to remove moisture.
Even an inexpensive model requires regular maintenance. Simple care prevents costly repairs and preserves the value of your purchase.
- Drain the water after every use.
- Wipe the keys and outer surface.
- Store the instrument in a dry place away from heat.
Investing time in maintenance is fundamental for any musician who wants to keep a melodica looking and sounding like new.
For a backup option or an accessory choice, see this practical guide: recommended accessory.
Finding resources to go further
The internet is full of guides, videos, and forums to build on your foundations and enrich your musical practice.
Start with piano keyboard methods, free sheet music, and targeted exercises. These resources strengthen theoretical knowledge and dexterity.
Specialized forums devoted to the harmonica and wind instruments offer opinions on models, quality, and the best price, including when buying used.
- Educational websites: sheet music and step-by-step lessons for learning to play.
- Videos: technical demonstrations and tonguing exercises.
- Communities: user feedback on models and maintenance.
Choosing higher-quality resources remains essential for rapid progress. Explore several sources and adapt them to your level to open new musical horizons.
Conclusion
The melodica combines the simplicity of breath with the richness of a keyboard to create remarkable sounds. It brings together the expressiveness of a piano and the mobility of a wind instrument.
By following this guide, you have gained a foundation for choosing a model and achieving better-quality playing. The quality of your work depends on consistency and attentive practice.
Whether you enjoy piano or other musical styles, this instrument offers wonderful versatility. Keep exploring tunes, refining your technique, and sharing your music.