
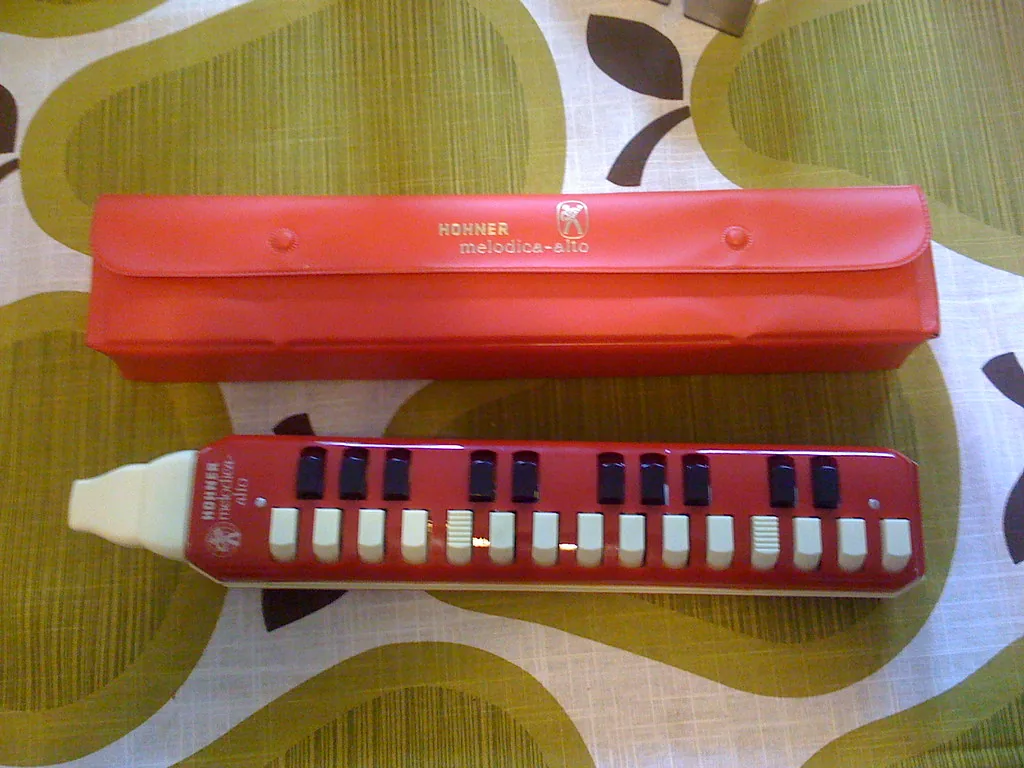
The melodica is a free-reed instrument that works in a similar way to the harmonica. Its simplicity and range of sounds appeal to children and professionals alike.
Regular practice provides a solid foundation for learning music. Mastery depends on a good understanding of the mechanism and breath control. These fundamentals support technical progress and listening skills.
Many online resources now follow a consistent teaching approach. Tutorials and methods provide practical exercises for building a stable foundation. Start by exploring this content and repeating short patterns.
In short, this instrument offers a clear introduction to music. With practice, you will establish a lasting foundation and gain confidence.
Understanding how the melodica works
The secret of its sound lies in the interaction between the keyboard and the player’s breath. The keyboard is identical to that of a piano or organ, making it easy for musicians to learn. Each key operates mechanically: pressing it opens a valve that allows air to pass through.
Inside, a mechanical system directs the airflow toward the reeds. The note is created by the vibration of a free reed. Depending on the model, the range extends from one and a half to three octaves, providing a variety of notes for playing melodies.
- A keyboard similar to that of a piano or organ, ideal for beginners already familiar with one.
- Each key opens a dedicated valve for a precise response.
- The mechanical system directs the air toward the vibrating reed.
- A variable range of 1.5 to 3 octaves expands the choice of notes.
This simple design creates a stable tonal foundation and enables highly precise playing.
Melodica: a complete beginner’s guide
A clear method focused on breathing and posture provides the foundation for confident, expressive playing.
Breathing and posture are the two fundamentals to master from the very first exercises.
Breathe from the diaphragm to produce a stable, controlled sound. Maintain an upright posture with relaxed shoulders so that you can play without tension.
Coordination between your breath and fingers develops through short, regular sessions. Practise slowly, then gradually increase the tempo.
- Daily practice: 10 to 20 minutes of focused exercises.
- Posture: straight back, instrument aligned with the torso.
- Breathing: deep inhalations and controlled exhalations.
| Aspect | Goal | Exercise |
|---|---|---|
| Breathing | Airflow control | Diaphragmatic breathing, inhaling for 4 seconds and exhaling for 6 seconds |
| Posture | Comfort and endurance | Sit upright with relaxed shoulders and hands |
| Coordination | Finger fluency | Slow scales and simple rhythms |
History and origins of this wind instrument
The roots of this wind instrument extend back to early prototypes in whose development acoustic research played a decisive role.
The melodica was inspired by the harmoniphon, designed by Dijon native Jacques Reine Pâris. This invention laid the foundation for its design and operation.
Before the modern form appeared, Ch. Weiss’s Symplexophon, created in 1870, showed how free-reed and keyboard concepts could evolve. In 1908, Hohner introduced the Hohnerette, a brief but important stage in this development.
In the twentieth century, artists such as Augustus Pablo popularised the use of this instrument in reggae music. This established these small wind instruments within modern culture.
- Harmoniphon: historical foundation and technical basis.
- Symplexophon (1870): evolution of acoustic ideas over time.
- Hohnerette (1908): an industrial milestone on the way to the modern form.
“The evolution of these wind instruments reflects a rich history spanning several decades of acoustic research.”
Anatomy and essential components
Every internal component directly affects the colour and stability of the sound.
At the heart of the melodica are simple yet precise components that form its acoustic foundation. These parts work together to ensure a reliable response whenever a key is pressed.
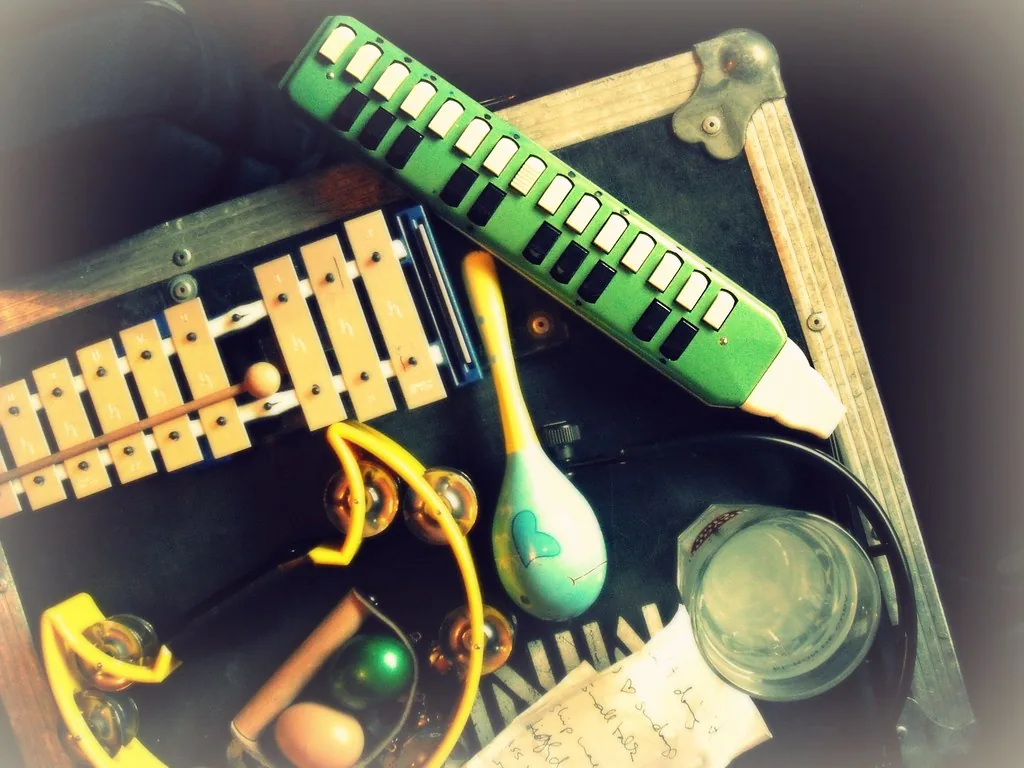
The keyboard operates valves that open the passage for air. Pressing a key directs the airflow toward a free reed. It vibrates and produces the desired note, as in a small organ.
The role of the free reed
The free reed is generally made of metal, cut and bent to form a vibrating tongue. It is the foundation of the notes. In premium models, materials such as brass improve quality and durability.
The blowing system
The air tube connects the mouthpiece to the main body and allows air to flow precisely. Internal valves control this flow whenever a key is pressed, ensuring stable production and sustained sound.
- Metal reeds: cut and bent to produce notes.
- Tube and valves: control the airflow whenever you play.
- Brass components: better quality and increased durability on certain models.
The different model categories
Models are classified mainly by their control system: keyboard or buttons.
Keyboard versions are the most widespread. They offer up to about 36 keys and allow the instrument to be placed horizontally. This makes it possible to form complex chords with both hands.
Button models are rare and produced mainly by Hohner. They come in four variants: alto, student, piano, and soprano. These types offer different approaches to playing.
Finally, three variants deserve mention: the accordina, couesnophone, and vibrandoneon. Each has unique tonal and mechanical characteristics.
“The classification is based mainly on the type of control system, whether keyboard or buttons.”
| Category | Characteristic | Use |
|---|---|---|
| Keyboard | Up to about 36 keys, horizontal position | Two-handed chords, educational practice |
| Buttons (Hohner) | Alto, student, piano, soprano | Melodic playing, portability |
| Variants | Accordina, couesnophone, vibrandoneon | Specialised sound resources |
To learn more about its history and models, see this detailed encyclopaedia page.
Mastering posture and how to hold the instrument
Adopting a stable posture makes movement easier and prevents unnecessary tension.
Sit or stand with your back straight and shoulders relaxed: this foundation prevents stiffness during long sessions.
Hand position
The right hand holds the grip and plays the keyboard precisely. The left hand stabilises the instrument, providing a secure foundation for movement.
Keep your fingers close to the keys to make quick, fluid movements. Relaxed movement prevents fatigue and improves control.
If you prefer to set the instrument down, you can attach a mouthpiece to the tube. This allows you to play without lifting the instrument while maintaining a stable body position.
- Hold the grip firmly to free your right hand.
- Stabilise the instrument with your left hand without gripping it too tightly.
- Adjust the instrument’s height to align your wrists.
For educational references and posture exercises, consult this technical guide.
Breathing techniques for a harmonious sound
Controlling your breath turns a simple stream of air into a reliable musical foundation. This regular flow, aligned with the tempo, creates a stable rhythmic foundation that helps you play clear melodies.
The beak-style mouthpiece requires an approach similar to playing a recorder. Position your mouth so that you direct the air without applying excessive pressure.
Pay attention to the force of the air: if it is too weak, the note lacks attack; if it is too strong, the sound becomes muddled. Practise slow scales to adjust the pressure across the entire range.
Explore nuances by varying your articulation. Staccato requires short bursts of air. Legato requires a continuous, flexible flow. These types of attacks enrich musical phrases and help musicians shape their expression.
| Technique | Purpose | Exercise |
|---|---|---|
| Steady breath | Rhythmic foundation | 4/6 diaphragmatic breathing while playing quarter notes |
| Controlled pressure | Note accuracy | Slow scales with varied dynamics |
| Articulation | Tonal nuances | Alternate between staccato and legato on the same melody |
Hand coordination and keyboard playing
Hand coordination turns a simple passage into a fluid musical phrase.
The right hand plays melodies by operating the keys. The left hand stabilises the instrument and supports the movement.
To explore chords, work slowly. Press several keys at once to feel the relationship between the notes.
The foundation of coordination is hand independence. Practise patterns in which each hand follows a different line to develop greater independence.
- Start with slow arpeggios to coordinate fingering and breathing.
- Gradually increase the speed while maintaining a stable foundation.
- Check that every note is played in tune.
| Goal | Exercise | Expected result |
|---|---|---|
| Hand independence | Two contrasting lines at a slow tempo | Solid rhythmic foundation and independent hands |
| Accurate chords | Fixed positions, changing one finger at a time | Clear chords and balanced notes |
| Keyboard fluency | Repeated arpeggios and scales | Smooth transitions between chords |
Regular practice improves your playing and consolidates the technical foundation needed for more complex pieces.
Exploring chords and rhythmic nuances
Exploring chords turns a simple progression into a rich, expressive body of sound.
The foundation of this work is coordination between breathing and fingering. The right hand can press several keys at once to enrich the harmony. This approach adds greater depth to melodies.
Using staccato
Staccato adds clean breaks to phrasing. It creates rhythmic accents that energise each piece.
Practise short phrases by alternating between staccato and legato. This helps the hand control the note attack and the duration of the breath.
Creating rich harmonies
The right hand plays a central role on the keyboard. Pressing several keys produces full chords and varied tonal colours.
- Regular chord practice is the foundation of an expressive texture.
- Alternate between individual notes and chords to maintain interest.
- Coordinate the left hand to support and balance the right hand.
“Mastering chords turns accompaniment into expressive material.”
The importance of professional adjustment
Professional adjustment ensures that every internal component works in unison. A specialist identifies the source of malfunctions and corrects problems precisely.
Adjustments made without expertise can impair sound quality. Undetected air leaks or poorly calibrated reeds make the sound unstable.
A technician performs a detailed diagnosis of the mechanical system, then adjusts the reeds and repairs the seals. They have suitable tools for working without damaging the components.
Entrusting maintenance to a professional extends the life of the instrument and preserves its tuning. Preventive maintenance ensures optimal airflow and a lasting dynamic response.

“An accurate diagnosis is the foundation of a successful adjustment and faithful restoration of the instrument’s timbre.”
- Repairs: correcting leaks and replacing seals.
- Adjustments: calibrating reeds for stable intonation.
- Tools: measuring instruments and specific replacement parts.
Tips for regular maintenance
A few simple steps are enough to limit the build-up of moisture and dust.
Daily cleaning: wipe the outer surface with a soft cloth after each use. This removes fingerprints and preserves the finish.
Mouthpieces:
Cleaning the mouthpieces
Wash the mouthpiece periodically in warm, soapy water to prevent dirt from accumulating. Rinse it thoroughly and allow it to air-dry before replacing it.
- Frequency: after frequent use or whenever you notice condensation.
- Method: lukewarm water and mild soap, without harsh cleaning agents.
- Special case: replace the mouthpiece if cracks appear.
Storage and periodic maintenance: store the instrument flat in a dry, dust-free place. Once or twice a year, arrange a thorough cleaning to remove persistent dirt from the internal components.
| Action | Frequency | Expected result |
|---|---|---|
| Wipe the exterior | After each use | Preserves the quality of the finish |
| Clean the mouthpieces | Weekly or monthly, depending on use | Hygiene and playing comfort |
| Thorough maintenance | Once or twice a year | Protects the mechanical system and tuning |
Available learning methods and lessons
To progress quickly, choose learning paths that combine breathing, posture, and rhythm.
Traditional lessons at a music school teach how to hold the instrument, work on tempo, and learn keyboard chords. They provide a structured educational foundation for reading notes and playing pieces.
Online courses offer video tutorials and sequences that you can repeat at your own pace. They are suitable for musicians who enjoy independent practice and immediate access to lessons.
Private lessons can be fully adapted to the student’s level. The teacher adjusts the exercises to match specific goals: technique, complex chords, or ear training.
- Techniques covered: breathing, posture, tempo, and musical phrasing.
- Resources: schools, private tuition, and video tutorials.
- Tip: use a metronome to structure your practice.
| Type of lesson | Advantage | Recommended for |
|---|---|---|
| Music school | Structured programme and progression | Beginners and young musicians |
| Online lessons | Flexibility and practical videos | Adults and self-taught players |
| Private lessons | Personalisation and individual support | All levels and specific goals |
To explore useful digital resources and applications, see these applications and learning resources. They complement practical work and encourage regular learning.
Choosing your first instrument by its number of keys
For a first purchase, the number of keys determines the available range and playing ergonomics.
Beginner models generally offer two and a half octaves, or 32 keys. This configuration provides a solid foundation for learning notes without lacking range.
Other versions are available: 37 keys, or three octaves, and 44 keys, or three and a half octaves. These are aimed primarily at experienced musicians seeking greater quality and more harmonic resources.
Bear in mind that more octaves mean more notes and a larger instrument. Your choice of keyboard affects its size and playing comfort.
- 32 keys: an ideal foundation for most beginners and simple repertoire.
- 37 or 44 keys: a wider range for playing demanding pieces.
- Choose at least 32 keys to avoid running out of notes during a piece.
In short, the choice depends mainly on the number of keys. Match it to your level, the type of keyboard, and the tempo of the pieces you want to play.
The melodica’s influence on musical culture
Its airy timbre has crossed borders and found a place in many repertoires. The melodica brings an instantly recognisable colour to reggae, ska, jazz, pop, and rock.
The foundation of its success lies in its free-reed mechanism: the sound remains light, nasal, and highly expressive. This instrument serves both as a lead instrument and as an atmospheric effect.
Dedicated festivals, such as the Melodica Festivals in Cologne, New York, Hamburg, Sydney, and Melbourne, bring musicians and enthusiasts together around this practice each year.

- Studio use: soundtracks and film atmospheres.
- On stage: a distinctive colour in pop and rock groups.
- In traditional music: modern integration into folk ensembles.
| Context | Role | Sound effect |
|---|---|---|
| Reggae and ska | Main melodic instrument | Warmth and rhythmic breathing |
| Jazz and pop | Colour and solo | Airy, expressive texture |
| Soundtracks and folk | Atmosphere and fusion | Modern timbre contrasting with acoustic instruments |
“The cultural strength of this instrument lies in its ability to combine simplicity with tonal character, both in the studio and on stage.”
Tips for making rapid progress
Establishing a short, focused routine often accelerates progress. Set up a daily practice session of 10 to 20 minutes. This makes memorisation easier and builds confidence on the melodica.
Work on tempo with a metronome. Play a piece slowly, then gradually increase the pace. This method improves the accuracy of your playing and the consistency of your breathing.
Pay particular attention to your hand position and how you hold the instrument. Good posture reduces fatigue and limits technical errors.
Vary the types of exercises you practise: scales, arpeggios, and chords. Press each key consciously, sometimes several times a day, and also work on the mouthpiece to stabilise your tone.
Follow these tips: repetition remains the foundation of all progress. Alternate your routines according to the time available and, in the event of a difficulty, return to the fundamental exercises.
Conclusion
Conclusion
Progressive learning quickly opens the door to a vast repertoire.
The melodica remains a versatile and accessible instrument. By working on breathing and keyboard technique, you will gain precision and expressiveness.
Regular practice, combined with simple maintenance, ensures lasting sound quality and optimal longevity.
Whether you are a beginner or an experienced musician, this instrument inspires many artists and styles of music around the world.
To develop your first pieces and find practice materials, see these online lessons and accompaniments.